6 Steps on the Mind Mapping Note-Taking Method
Have you ever felt overwhelmed by the sheer volume of information you need to absorb? Do endless pages of linear notes leave you feeling lost in a sea of words? Imagine a note-taking system that mirrors the way your brain naturally processes information. This is the power of mind mapping, a visual and intuitive method that can transform your learning and productivity.
By the end of this article, you’ll know exactly how to create a mind map that enhances your memory, boosts your productivity, and simplifies complex information. Along the way, we’ll dive into why mind mapping works, how to avoid common mistakes, and when it’s most useful. Whether you’re a student trying to ace exams or a professional looking to organize your ideas, this guide has got you covered.
What Makes Mind Mapping So Effective?
At its core, mind mapping mirrors how our brains naturally process information. Instead of writing notes in a rigid, linear structure, mind mapping lays everything out in a visual and interconnected format. This approach taps into both the logical and creative sides of your brain, making it easier to understand and remember what you learn.
For instance, consider preparing for a presentation. Writing a linear outline might leave you with disjointed notes that lack flow. On the other hand, a mind map visually connects your main ideas with supporting points, allowing you to see the big picture and the details simultaneously. Research has shown that visual learners retain information more effectively when it’s presented in a structured yet dynamic way.
Tony Buzan, the inventor of modern mind mapping, called it “a Swiss army knife for the brain.” And he wasn’t wrong. By leveraging visuals, associations, and keywords, mind mapping maximizes the way we absorb and organize knowledge.
6 Steps to Create a Mind Map
Step 1: Start with a Central Idea
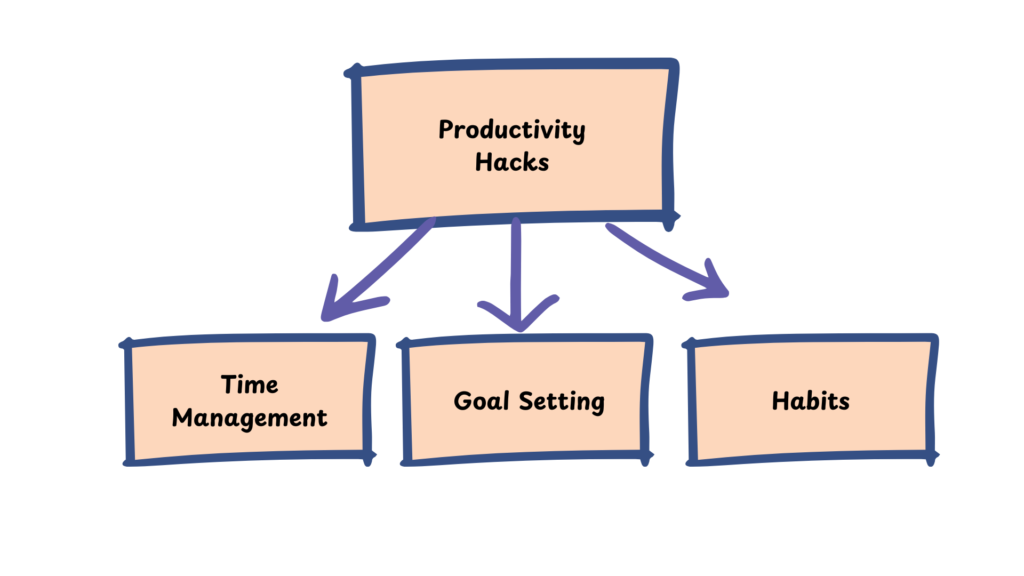
Your journey begins by identifying the main topic you want to explore. Write this idea in the center of your page and draw a circle around it. Keep it simple—one or two words are enough. For example, if you’re brainstorming ideas for a blog post, your central idea could be “Productivity Hacks.”
This central element acts as the anchor for your mind map. The clearer and more visually appealing you make it, the better your mind will connect with the information. Using a bold color or an engaging font can make it stand out.
Step 2: Add Main Branches
From the central idea, draw lines outward to create main branches. Each branch represents a key category or subtopic related to your main idea. Think of these as the pillars that support your central concept. For instance, if your mind map focuses on productivity, your branches might include “Time Management,” “Habits,” and “Goal Setting.”
At this stage, try to focus on clarity rather than perfection. You’re setting the framework, and it’s okay to adjust as your ideas grow. Using straight or curved lines gives the mind map an organic flow, mimicking how our thoughts naturally expand.
Step 3: Expand with Sub-Branches
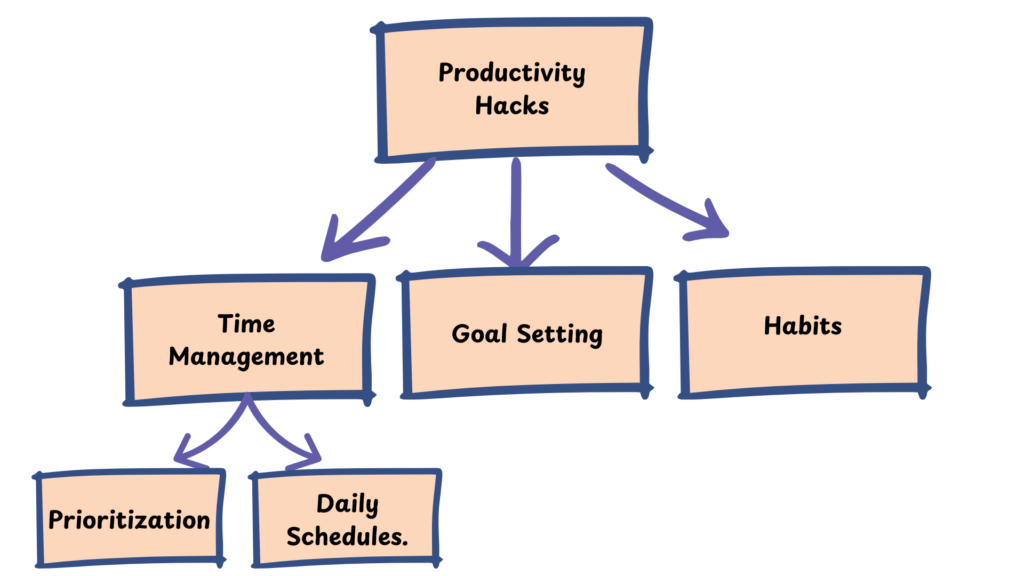
Once your main branches are in place, dig deeper by adding sub-branches to elaborate on each category. These sub-branches provide more detail, breaking down broad ideas into manageable pieces. For example, under “Time Management,” you might include concepts like “Prioritization,” and “Daily Schedules.”
This step is where your creativity shines. Use keywords instead of long sentences to keep the map concise. Each sub-branch should feel like a stepping stone, connecting seamlessly to the larger framework.
Step 4: Make It Visual
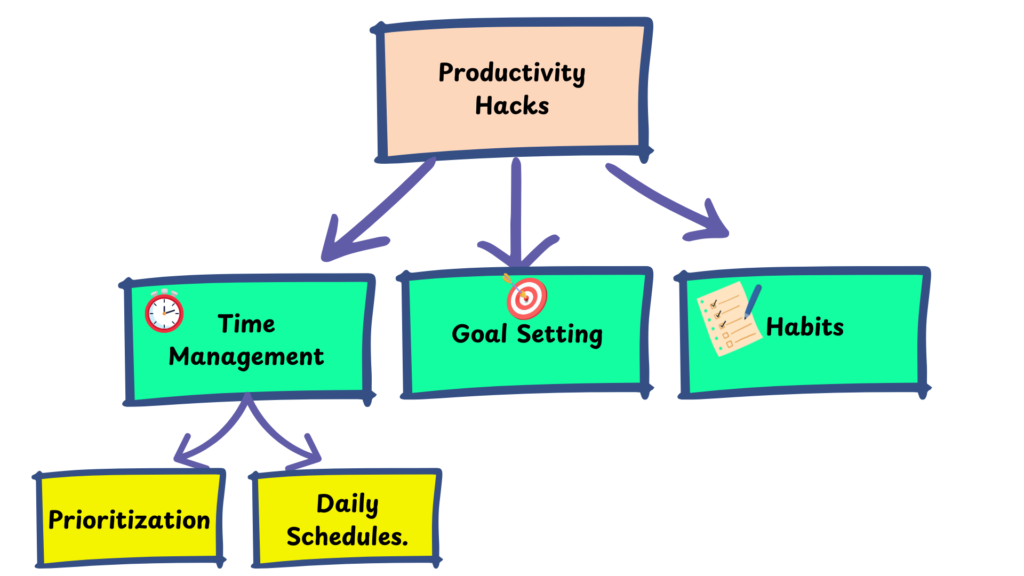
A mind map thrives on visual appeal. Adding colors, symbols, and images transforms your notes from plain text into an engaging, memorable tool. Assign a unique color to each branch and use icons or small drawings to represent key ideas. For example, a clock icon could represent “Time Management,” while a rocket could symbolize “Goals.”
Research suggests that visuals improve recall by as much as 65%, making this step critical. If drawing isn’t your thing, digital tools like XMind or MindMeister offer pre-made icons and templates to enhance your map without much effort.
Step 5: Keep It Simple
One common mistake with mind mapping is trying to include too much information. Remember, the goal is clarity, not clutter. Stick to single words or short phrases for each branch and sub-branch. Avoid overwhelming your map with excessive details or tangents.
To maintain focus, revisit your mind map regularly. As you refine it, you’ll notice areas that can be streamlined or expanded for better understanding.
Step 6: Review and Revise
Mind maps aren’t static. As you gather new information or revisit old topics, your mind map should evolve. This iterative process helps reinforce memory and ensures your notes remain relevant. Set aside time to review your map and make adjustments—whether that means adding new branches or simplifying existing ones.
Imagine using a mind map to plan a vacation. Over time, as you research more about your destination, you can update the map with additional details like local attractions, budgeting tips, or travel itineraries. The result? A dynamic, visually engaging plan you can refer to anytime.
A Practical Example
Let’s bring these steps together with a practical example. Suppose you’re creating a mind map on “Healthy Living.”
- Start with “Healthy Living” as your central idea.
- Add main branches like “Nutrition,” “Exercise,” and “Mental Wellness.”
- Expand each branch with subtopics. For “Nutrition,” you might include “Meal Prep,” “Hydration,” and “Balanced Diet.”
- Use visuals, like a water droplet icon for “Hydration.”
- Update your mind map regularly as you discover new recipes or fitness routines.
When to Use Mind Mapping Note-Taking Method
Mind mapping is incredibly versatile. It’s ideal for brainstorming sessions, project planning, studying for exams, or even writing a book. A student preparing for a history exam might use a mind map to organize key events chronologically, while a writer could outline a novel by mapping out plot points, characters, and themes.
Digital tools like XMind or MindMeister make it even easier to create, edit, and share your mind maps. Whether you prefer pen and paper or a sleek app, the choice is yours.
Conclusion
The mind mapping note-taking method is more than just a tool—it’s a way of thinking. By visually organizing your ideas, you’re not only improving how you take notes but also how you process and apply information in everyday life.
Spend 10 minutes today creating a mind map on a topic you’re passionate about. Post your results in the comments or share them on social media with the hashtag #NoSlackMindMapChallenge. I cant wait to see what you guys come up with.


